I remember how little I knew when our group of friends began riding and touring adventure motorcycles. We had to learn from our mistakes and was lucky to never end up in serious trouble. If you are a beginner at dual sport or adventure riding, and want to start touring on your motorcycle, here is a list of 26 tips and riding techniques that I wish I knew when I started riding dual sport bikes.
Learning these tips and techniques will not only make you a better adventure bike rider off-road, but it will keep you safe. That way you can ride with confidence and have more fun on the trails.
#1: All the gear, all the time (ATGATT)
The golden rule when riding an adventure bike is ‘All the gear, all the time’ (or ATGATT). It is impossible to over-stress this point and the reason why it is number one. It doesn’t take much to snap an ankle when riding a 600 lbs adventure motorcycle in the dirt, or in your back yard even. Always wear your boots. I recommend proper motocross boots.
This goes without saying, but your helmet is non-negotiable. If you don’t want to lose the skin on your hands, wear gloves. Long pants and a jacket are next on the list. I know it can get boiling hot in your riding gear, but coming off the bike in shorts and a t-shirt will be painful. I know, because I saw my wife rear-end a car wearing Crocs and a short-sleeve blouse. She was lucky to be going slow and she only bruised an ankle after flipping her BMW. All our gear was in our top boxes because it was 105 degrees out. From then on ‘ATGATT’ was our motto.
#2: Practice your balance
Dual sport and adventure motorcycles are tall and heavy. Understanding the balance of your bike is very important and can make it so much more controllable. Start by standing next to your bike and holding it upright without its stand. Take hold of the top of the windscreen with one hand and find the balancing point. Now walk around the bike. Keep it balanced like that by alternating your hands. You are only allowed to hold onto the top of the windscreen. You’ll be amazing how easy it is to balance the bike with almost no input.
Learn to pull away with both feet on the foot pegs of your motorcycle. Start by trying to stand on the both pegs as long as you can. It will be awkward at first, but you’ll soon be able to stand a few seconds without the side stand down. Next, combine this with clutch control and only pull away once both feet are on the pegs. This might take some practice but will improve your control of your adventure bike tremendously.
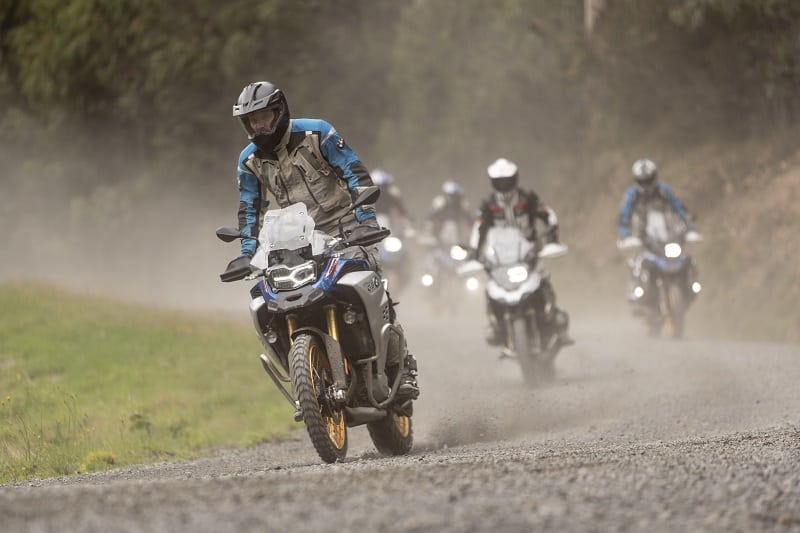
#3: Look up to where you are heading
This is one of the most basic adventure motorcycle riding skills that will make the biggest difference when riding a big dual sport bike. Your bike goes where your eyes point, no matter what the speed. If you are doing a tight u-turn at crawling pace, look over your shoulder in the direction you intend to go. It will be tempting to look down at your wheel, but that will just cause you to lose your balance on topple over.
While riding at speed on dirt roads, look as far ahead as possible. That way you can spot obstacles or an oncoming car long in advance. Adjust your pace to your field of vision. When going around a bend in the road, don’t go at a faster pace than that you will be able to stop from if you spot something in the road. As soon as you can see further around the bend, extend your gaze. If the road is very uneven you can quickly glance at the surface closer to your front wheel, but keep looking further ahead.
If you look at a rock or stump in the road, there is a very good chance you will hit it with your front wheel. Obstacle fixation is what they call it. In thick sand, the urge to look at every rut is very tempting. Here it is especially important to keep looking far ahead to pick a route where you want to ride.
#4: Loose grip and clutch control
Most beginner riders white-knuckle the handlebars when the going gets tough off-road. When the front wheel starts bucking this way and that, it is natural to want to hold on tight and fight it to get back in line. This is a common mistake adventure bike riders make. You need to loosely hold the bars by only just closing your fingers around it. Cover the clutch and front brake levers with two fingers only. By covering the levers you get used to modulating them, instead of stabbing the brake when you are startled. By only using two fingers, the other two (and you thumb) can hold onto the handlebar so you don’t get left behind.
You want the front wheel to be able to move around when pushed by obstacles or sandy ruts so that it can self-correct. Using the clutch to feed in or cut power is also a valuable skill that gives you much more control in sand, mud and during water crossings. To get this right, your levers need to be set to a position that is comfortable for both standing up and sitting down. If you don’t have a hydraulic clutch, make sure your clutch cable is oiled and can move freely and without friction.
#5: Cornering on loose gravel
If you are used to street riding, you’ll be used to leaning into a corner. This will end in tears on loose gravel. When you lean the bike over, the contact patch of the tires will be very thin and with the weight of the bike out from under you, it will be easy to lose traction and wipe out. Rather counter-weight the bike by moving your body over to the outside of the turn. Keep your gaze far ahead, around the bend with your shoulders square to the handlebars.
By moving your weight to the opposite side, the bike will move naturally in underneath you and regain traction. Keep your weight firmly on the outside foot peg to increase the pressure on the contact patch of the tire.
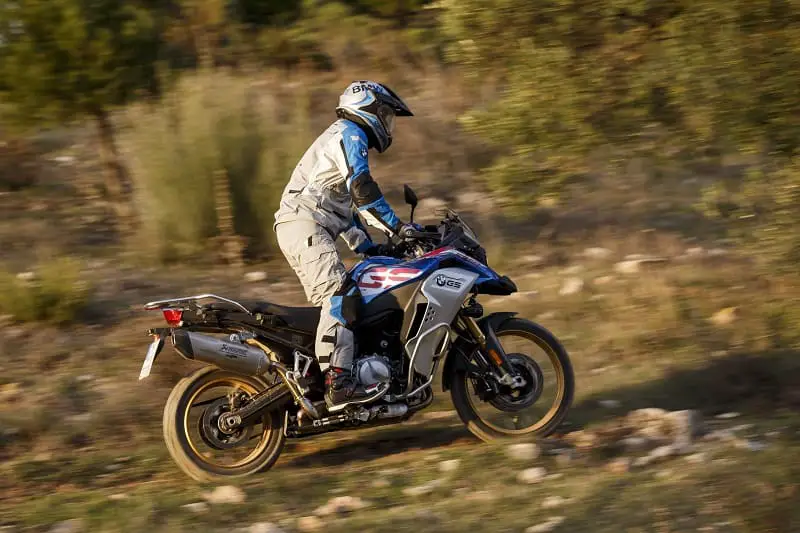
#6: Learn to stand while riding
You’ll often see adventure bike riders stand up on their pegs. This is not because they are resting their backsides from a long day in the saddle (except maybe KLR riders), but rather to move the center of gravity from high up on the seat to low down onto the foot pegs. Even a small lift of your butt will accomplish the same effect. Keep your knees bent slightly and maintain a comfortable and relaxed position.
Let your bike’s suspension do all the work while you simply direct it using the controls. To save your arms from getting too tired, grip the tank with your knees and assist the steering by applying firm pressure on the foot pegs. An added benefit of standing upright is better vision of the road ahead and any obstacles right in front of you.
#7: Use the front brake to stop
At first, you might be afraid of wiping out your front wheel by using the front brake. In a low traction environment, you do want to avoid applying the front brakes while turning a corner. But in a straight line, it is your front brake that will make you stop, not your rear! This is very important. You need to practice finding the point where your front end loses traction.
Remember to switch off ABS in the dirt, otherwise your bike might not stop at all. Many modern adventure bikes has off-road ABS which allows some wheel slip before intervening.
We cover using a combination of front and rear brakes to make an emergency stop in Tip #9 below.
#8: Use the rear brake to steer
Your rear brake is not very effective at making your bike stop, but it can be very useful in steering the bike around sharp bends. Stomping on the rear brake while tugging on the handlebars will send the bike into a skid. Practice this until you can bring the rear wheel around 90 degrees with control. Depending on your adventure bike’s braking system, you will have to switch off ABS entirely or engage off-road ABS. Otherwise, nothing will happen when you step on the lever.
#9: Emergency stop on loose gravel
Bringing a heavy adventure bike to a quick standstill on loose gravel needs to be practiced until it becomes muscle memory. You don’t have time to think in an emergency situation. Here’s what you need to practice:
Stand up and lean back to get ready for the deceleration to throw you forward. Stomp (and I mean hard) on the rear brake lever to lock up the wheel. Dragging the rear wheel will accumulate dirt in front of the tire, adding some stopping power.
The front brake needs to be pulled in hard and progressively until just before it locks up. To practice this, ride slowly in first gear and lock up the front wheel in a straight line to get a feel for the point at which it lets go. This does not come naturally, so you need to practice this often for it to become second-nature. The reason why you want brake progressively at the front is because you first want to transfer some weight to the front wheel to increase the grip. As you gain more traction, you can progressively feed in more stopping power.
Combining a locked rear wheel and a lot of front brake is the most effective way to stop a big adventure bike. The front brake makes you stop and the rear keeps the bike stable. Some modern ADV motorcycles have off-road ABS settings that do most of this for you, so you can simply grab a handful and slam on the rear brakes, while focusing on keeping the bike upright.
#10: Practice picking up your heavy bike
While practicing your off-road riding skills you will have plenty of opportunity to practice picking up a fallen bike. This is a good thing, as lifting a 800 lbs BMW R 1250 GS Adventure with a month’s worth of camping gear requires the correct technique. Lean your backside against the seat, legs shoulder width apart, and grab onto the crash bars and rear luggage rack or frame. Lean all the way back and walk the bike upright by reversing yourself closer to it. Be careful not to drop it over to the other side though. Practice makes perfect.
A lighter dual sport bike can be picked up by grabbing the handlebar nearest the ground at the outer most edge with both hands. Turn the bike so the front wheel faces up and lift the bike from your knees (not your back!). The wide handlebars and the position you grab onto acts as a torque lever to more efficiently transfer your waning strength.
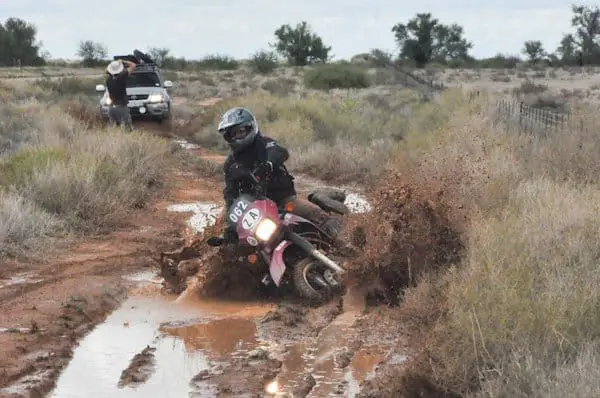
#11: Keep the momentum
In tricky off-road situations momentum, not speed, is your friend. Whether you are riding soft sand or up a steep rocky incline, maintaining momentum is vital. Many riders will tell you the best way to tackle sand is to look up, stand up and open up.
You definitely don’t want to keep on accelerating until your reach such a silly speed and then come off the bike. Maintaining momentum is different. You want to be going as slow as possible while not bogging down or stalling. Using the clutch is very useful to get this right. Just enough power to keep the front light while feathering the rear brake to keep the speed in check and let the rear of the bike squat down.
In mud, you want to go as slow as possible. Again, you want to feed in just enough power by feathering the clutch so that you keep moving. Spinning the real wheel in mud will cause you to instantly wallow in the mud.
#12: Ergonomics and bike setup
One of the things that make adventure bikes so comfortable (see this post for 6 more reasons) is the neutral riding position. The easier and most beneficial adjustment you can make is the handlebar height. Many modern adventure bikes are already set up for riding while standing up, but if you are tall it may pay to raise the handlebars with risers. You will usually be riding technical terrain when standing up, so it will help if you are comfortable and able to reach all the controls of your motorcycle easily in that position.
#13: Foot pegs and motocross boots
Any many situations, such as standing while riding technical off-road sections, the most important link between you and your adventure bike will be the soles of your boots and the surface of your foot-pegs.
Having wide, sturdy foot pegs with a serrated contact area will allow you a sure footing. Add motocross boots with grippy soles and you’ll have a much tighter connection with your bike. There is nothing worse than a foot slipping off a peg while battling your bike in the sand or bumping over rocks.
Position your weight on the balls of your feet for the best balance. Point your heals slightly downward in the rear to avoid your feet snagging on a root or branch.
I wrote a post on adventure bike accessories which you can check out HERE. But if you are only getting one upgrade, get the wider foot pegs.
#14: Keep the front end light
When riding over obstacles, pot holes or soft sandy patches in the road it is important to keep the front end light. This will prevent it from digging in and will help it clear smaller obstructions or ruts without unsettling the bike too much. Once the front wheel is clear your rear wheel will follow.
In order to do this, stand up and lean backward while blipping the throttle. The quick acceleration will transfer the weight of the bike to the rear wheel and allow the front end to become light.
#15: Small practical wheelies
For bigger obstacles like a fallen log, exposed tree root or a deeper rut, an exaggerated version of Tip #14 above is called for. A well-timed small wheelie is a safe and practical way to clear much larger obstacles.
A few feet before the obstacle, in second gear, stand up on the pegs and push down hard on the suspension. You want both the front and rear shocks to compress. Just before it reaches the lowest point roll on some throttle and as the suspension bottoms out, feed some power by releasing the clutch. Lean backward as you come upright and give it some gas.
Practice with varying amounts of throttle and clutch. Remember to cover the rear brake if you are aiming for a higher wheelie, especially if you have never done it before. If it feels like you are losing control, pull in the clutch to cut the power. This will bring the front end down immediately and prevent a wipe out. Touching the rear brake will bring you down even quicker.
The idea, however, is to just lift the wheel high enough to clear the obstacle. A feet or two is more than enough. You are not trying to stand the bike upright like Chris Birch.
#16: Off-camber gravel bends
Off-camber gravel can easily catch out an inexperienced rider, especially in a low traction environment. Cut the speed before you enter the turn and look towards the exit. Don’t go faster than you feel comfortable and position your body-weight over the outside of the turn so the center of mass is directly above the tires’ contact patch. If it really feels loose under you, you might want to put your inside boot out to catch the bike in case it loses traction.
#17: Riding corrugated dirt roads
Graded dirt roads that see a lot of traffic, especially from fast heavy vehicles with over-inflated tires, often develop corrugations or wash-board like ridges. In a straight line it is simply uncomfortable, but around a bend it can be down-right scary. Because your tires only touch the surface at each crest, you have much less traction than you think.
There is no magic trick to ride corrugated gravel roads. You need to continuously look for the smoothest track. Luckily the worst section only lasts a couple of hundred yards. Unfortunately, the same is true of the smoother areas. It is easier than in a car since you only need to worry about a single track of wheels.
Take care crossing the sandy ridge when passing from one line to the next, as it can throw you off balance. Get ready and give some gas to lighten the front wheel as cross over.
#18: Don’t overload the bike
This is a common mistake among newbie adventure motorcyclists. You’ve just bough a $20 000 bike and now want to add all the fancy accessories and take the latest camping gadgets on a trip. Overloading a bike not only messes up the handling and stopping distance, but puts a lot of stress on the suspension and frame.
Apart from it being dangerous, especially on uneven roads at speed, it can make your trip a living nightmare if you have to continuously pick up the bike in the dirt. Only take the bare essentials or take an SUV. A light bike is safer and more fun to ride.
#19: Dual sport tire pressure
There are different opinions on adventure bike tire pressure, but most experts advocate sticking to the tire pressures recommended by the manufacturer. The air in the tires protects the rims against impacts to avoid damage or a flat tire. In some situations airing down the tires can help get the bike unstuck, but you need to inflate it immediately afterward.
The correct pressure when riding at speed it vital for your safety. For an in-depth post on adventure bike tire pressures you can read my post HERE.
#20: Do your own bike maintenance
A properly maintained motorcycle is a much safer motorcycle. Have your bike serviced regularly or better yet, learn to do it yourself. Most of the important maintenance tasks are not rocket science, and by checking it regularly yourself, you will spot any red flags before it fails on you.
At a minimum you want to check your axle nuts, sub-frame bolts, shock mounts, and luggage attachments every now and then, especially after riding on rugged terrain. On a long adventure bike trip, you need to inspect your tire pressures, as well as the condition and tension of your chain daily. Adjust and lube the chain if necessary. See my post on chain maintenance on an extended bike trip.
#21: Practice tire repair
The most likely breakdown on a long adventure bike trip is a flat tire. Have a plan of action in case this happens. Depending on where you are riding, you might phone a friend to come get you. If you are riding off the beaten track you need to be able to fix it on the side of the road. In the latter case, it is best to practice this at home before you leave. A tubeless tire can be plugged if you are lucky and on a tube-type tire you simply replace the inner tube. Both situations will require you to carry something to inflate the tire with once you are done.
I wrote a post on different pumps to carry on an adventure bike trip. If you want to know more you can find it HERE.
#22: Don’t ride alone
There is something special about a solo adventure off the beaten track, but you need to be acutely aware of the increased risk you are taking. If you come off your bike and can’t ride anymore, you might have to wait a long time for help to arrive. If you do plan on venturing off on your own, tell someone exactly what route you are taking and what time you expect to check in. This is also not the time to ride like a hooligan. No power-slides or wheelies.
#23: Rest often enough
Older dual sport bikes has the built-in safety feature of smaller tanks and uncomfortable seats. These force you to stop regularly to fill up or stretch your legs. Modern adventure bikes are much more comfortable and have longer ranges, which may tempt you to ride further in a day.
While possible, extended periods of riding will drain your energy which can make you loose concentration. All it takes is an animal that cross the road in front of you or a tire blowout, and you’re off. Rest often and don’t ride too many hours in a day.
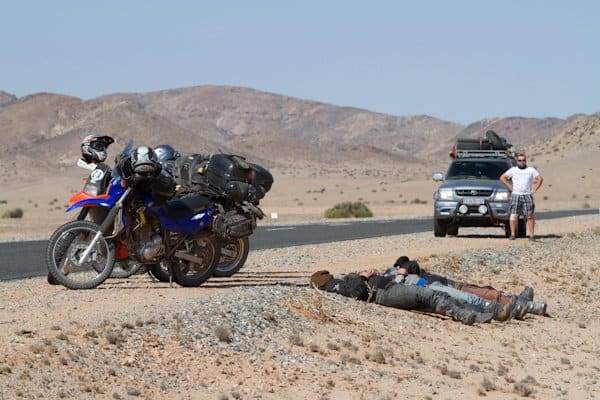
On our 90 day adventure bike trip across Africa, we rarely did more than 200 miles a day. This allowed us enough time to stop and meet the locals. We also had time to enjoy the campsite each afternoon after giving the bikes a proper inspection.
#24: Get the right helmet for adventure bike riding
The most appropriate helmet depends on where you intend to spend most of you time. Many adventure bike riders spend 95% of their time on the tarmac, in which case a full face street helmet may be best. If you intend to ride mostly dusty dirt roads in a group, a dirt bike helmet with motocross goggles will keep the dust out of your eyes.
Then there’s the dual sport helmets. Big enough to fit MX goggles, with a peak to keep the glare of the sun out of your eyes, it is a reasonable compromise if you ride both on and off-road. The video below explains it in more detail:
You can also read my post on the difference between dual sport and ADV helmets.
#25: Fastening luggage securely
If you are strapping luggage to the back of your adventure motorcycle, make sure it is secure. There is nothing scarier than a strap coming loose and a bag getting caught up in the sprockets. Locking up a rear wheel can send you in an uncontrollable skid and inevitable disastrous crash. Double check every piece of luggage each morning before you ride off.
#26: Rider training
Modern adventure bikes are surprisingly easy to ride on the pavement, but due to the enormous amounts of power, it can be a handful in the dirt. As a beginner rider it may seem daunting taking your new adventure motorcycle off-road, fully loaded with camping gear.
Apart from learning as much as you can about dual sport riding, enrolling for a beginner rider training course is invaluable. Not only may it save your life, but it will make each trip that much more enjoyable.
Final thoughts
Don’t be afraid of your adventure bike. Practice all these riding tips and techniques until it becomes second nature and have fun.
The open road is waiting.